By Barbara Donohue
Automatic part-measuring technologies can not only verify dimensions, but can collect the data for you and help improve quality.
Do certain features on certain parts cause you headaches or heartburn? If the answer is yes—and most folks in the machining business will probably answer yes—you might consider using automated measurement techniques to keep tabs on those challenging parts.
Many automated measurement options are available, measuring everything from a single critical dimension to an array of dimensions and forms on a workpiece. You can measure while a part is being machined, watch the dimensions of parts coming off a machine, or use a separate gaging station to measure dozens of dimensions on a finished part. Automated measurement systems come off-the-shelf or custom-made, and their abilities seem to be limited only by the imagination.
Various methods of automated measurement have been used for a long time. But over the last 30 years, innovations in sensors and improvements in computer technology have made automated measurement more and more applicable to different machining processes and machined parts. In addition to measuring parts and collecting the data, some measurement systems can even send information back to the machine.
What, how and when to measure
David Hayes, president of Control Gaging, Inc., Ann Arbor, Mich., described three classifications of measurements, according to where and when they are made:
In-process—inside the machine during the machining process
In-line—as soon as a part comes off the machine
Post-process—as a separate step, placing the part in a standalone gaging fixture, for example.
In-process measurement might include contact sensors within a grinder that measure the part while it is being ground. The WG2 gage head from Control Gaging Inc., is designed to withstand the hostile environment inside a machine. It protects the sensors within a small enclosure and contacts the part with fingers that are connected to the sensors. Though you can mount a touch sensor on the spindle of a machining center and use that to measure parts on the table, ideally the measuring device should have no relation to the mechanism that created the part. You want independent verification of part dimensions and need to have any error in the machine show up in the measurement, according to Don Engles, manager of the automation group at Productivity Inc., Minneapolis, Minn.

In-line gaging measures the parts immediately after a process is finished. For example, you might measure the outside diameter of individual parts as they come off a grinder.
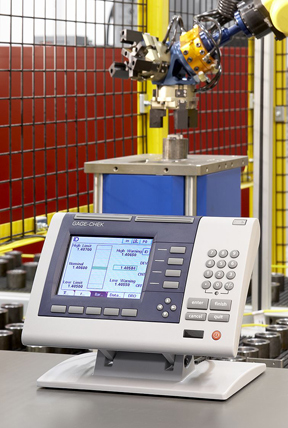
In post-process gaging you measure the part outside the machine. You’re “measuring in a world that is good for measurement,” said Jack Gaughan, vice president of sales and marketing at Edmunds Gages, Farmington, Conn. In a dedicated fixture, you can accommodate any necessary measurement conditions or adjustments. If a part coming out of a lathe is hot, for example, the measurement system can incorporate temperature compensation to allow for thermal expansion.
Preventing bad parts
To help keep parts within spec as tools wear or other drift occurs, some automated measurement systems can send measurement data to the machine control. In-machine measurement with feedback to the machine was used for grinding processes starting in the 1980s, Gaughan said. In the last decade, the technology has developed to provide this ability to feed dimensional information to other processes as well.
With the addition of a macro to the program for the part, the control can receive measurement data from the gaging system and calculate any necessary change in offset. Then it sends the offset adjustment to the machine. This way, adjustments are made before the dimension(s) go outside the tolerance band. This concept works with dimensions that can be changed with an offset adjustment, but not with others. Surprisingly, Engles said, shops sometimes forget this. A turned outside diameter is an ideal candidate, but an inside diameter produced by a drill, reamer or boring bar, can’t be corrected automatically.
Types of sensors
Many different types of sensors are used for automated measurement. Here are a few examples.
Linear variable differential transformer (LVDT): This is a type of contact sensor that measures displacement and can be used for measuring linear dimensions. Basically, the LVDT is an electrical transformer that produces a voltage output that varies with the location of a magnetically permeable core attached to a measurement probe.
Optical sensor: Similar to a video camera, this type of sensor captures an image of the part and determines the dimensions from the image.
Laser sensors: Several different kinds of laser sensors make non-contact measurements of distance. The Keyence LK-G5000 laser displacement sensor, for example, uses a triangulation method. The relative positions of the laser emitter and the detector allow the position of the target to be calculated according to the location at which the reflected beam strikes the detector.
Air gage: Air pressure or air flow can be used to measure the clearance between a part and a fixture. As clearance increases, the flow goes up and the pressure goes down. Air gaging is suitable for checking tolerances up to 0.005”, Gaughan said. This is an old technology and had fallen into disuse, he said, but it is ideal for many automated measurements.

Application examples
Very large parts and very small parts can be measured using the appropriate sensor technology and any necessary fixturing, special lighting, or other setup. Vision systems can measure small or delicate parts without having to touch and possibly damage or distort them. On the other extreme, Montgomery said that wind turbine blades are measured between grinding operations, using many sensors.
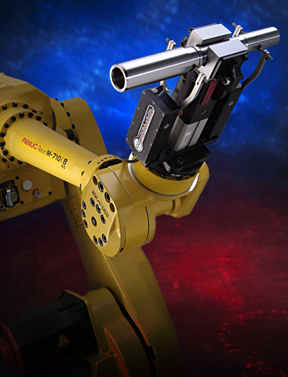
Sometimes measurements are used to control subsequent processes. Engles told about a particularly creative use of a measurement feedback system. For a small-engine manufacturer, Productivity Inc. provided a system for the CNC lathe that turned the pistons. The finished piston needed to weigh a certain amount. When machining was nearly complete, a robot removed the piston from the lathe and placed it on a scale. The scale sent the weight data to the machine control. A macro in the CNC program used the weight measurement to calculate the cutter compensation required to remove the correct amount of material to achieve the desired weight. The robot returned the part to the lathe and the turning process was completed.
Bringing automated measurement on board
If you have a part that is giving you headaches and you think it would benefit from automated measurement, contact a company that provides this type of equipment. Be prepared to discuss the print, the tolerance problems it presents and how you machine the part, plus lot size and other relevant information. Is there a regulatory requirement to retain measurement data, for example?
The good news about automated measurement is “this kind of technology has gotten down to where small, non-automotive shops can implement it and get a good return on investment,” Engles said. “You could hardly even do this 10 years ago. Now, it’s becoming more popular, and the price is coming down. What you could do for $100,000 10 years ago costs much less now.” Metrology equipment has become more affordable and machine tool control technology is more flexible and open than it has been in the past, making it easier to implement measurement feedback.
The cost of an automated measurement system or device varies greatly. A manual-load fixture measuring one dimension and feeding the data back to the machine might start at $3000, Gaughan said, and you could spend millions on a complex measurement station that checks a great many dimensions. From another company, a rough estimate for a simple, manually loaded gaging system with feedback was “no less than $15,000.”
When you encounter one of those headache-producing parts, check out your options for automatic measurement. You can start small with a simple gaging fixture, and over time, as costs go down and measurement capabilities improve, you may find that automated measurement can help you get a handle on more and more of those troublesome parts.
